Growing dill in your garden is best done in a sunny and protected spot. To prevent diseases, water regularly. When seedlings are only a few inches tall, thin them. Thinned dill can be eaten, so harvest the seeds while they are still small. Dill seedlings can grow four to six inches apart. Make sure you have enough space to promote air circulation, and keep disease at bay.
You can plant dill in a sunny and protected spot
Dill is happy in a sunny, protected spot in your yard where it will get plenty of sun. Dill thrives in rich, well-drained soil. This herb loves regular watering. Be sure to water your plants regularly during the summer heat. The soil should be amended with compost or well-rotted horse manure to ensure that it thrives. This will provide additional nutrients and retain moisture. The plant can be directly sown in the ground or placed in a large, pot with peat-free multipurpose soil.
Dill is easy to grow. Plant seeds under cover in spring to get started. It is best not to transplant until the frost risk has passed. If frost danger is gone, you can still plant dill bulbs in spring. Dill is a great plant for wildlife. It attracts hoverflies, bees, and other insects that feed off its nectar. It is also used as a food source by European swallowtail butterfly caterpillars.
Dill plants can be grown in either full-sun or part-shade conditions. To prevent them from falling apart, they must be staked. Depending on the location, you can harvest dill within two to four weeks. You can harvest the leaves of the plant during the spring and summer. If you have more dill plants, you can freeze them to use later.
Dill has few pest and disease problems. In warmer climates, Dill is susceptible to bolting. This means that the plant can grow rapidly, but have very few leaves. This is not ideal for harvesting. To prolong the life of your dill plant, consider planting it in a spot with 6 to seven hours of direct sunlight.
Prune dill plants
Pruning is necessary for dill plants. If the plant is left unpruned it will grow taller and leaner. It is best to trim dill by removing about a third of the plant's annual growth. This will encourage growth of new leaves lower down the stalk. It is also a good idea fertilize dill at a height of a few inches.
No matter what variety you have, you need to plant dill in a large pot with well-drained soil. Dill thrives on 6 to7 hours of direct sun. To allow air circulation, dill plants must be placed in a wide area to avoid getting too much soil.
The leaves of dill are a great addition to cut flower arrangements. However, the dill pruning procedure for cut flower arrangements differs from that for culinary purposes. Instead of cutting at the tips of the stems with a knife, use pruning shears and trim the stems to a maximum of a third. The stems will not produce more dill. This technique will also delay the flowering of the plant.
If you cut the dill plant after harvesting the leaves, you can store them in water to enjoy fresh dill later on. You can dry dill in a glass jar with a lid. You should change the water each day. This will preserve the flavor and freshness of the dill leaves for up to one week.
You can harvest the dill leaves at 6 inches. The best way to preserve the seeds is to harvest them and keep them until the next season. If you don't want to kill the flower, it is simple to harvest the seeds once they are dried. The seeds can be saved for future seedlings. But remember, dill plants cannot be kept alive for more than one season. They should be picked at the end. Dill plants can be destroyed by frost or heat.
Avoid growing dill close to Brassicas
The addition of dill to your garden can prove beneficial as it attracts beneficial insects while deterring pests. Dill is good for plants in the Solanum family, which includes brassicas like cabbage, Brussels sprouts and cauliflower. This companion plant is particularly effective when it is planted near cabbage and broccoli. The plant produces compound umbels with white flowers and a light brown fruit. You can also grow it as a green manure plants.
Dill is a low-maintenance plant that can spread many diseases to other plants. Leaf spot is one disease that dill may be vulnerable to. This can be caused by microorganisms or fungi. It isn't dangerous for dill plants but can cause severe damage to other plants.
Dill is generally a hardy plant that can be grown in USDA Zones 3-7 in summer, and USDA Zones 9-11 winter. This makes it ideal for use as a companion plant for other plants, including Brassicas. It is a good choice for crops as it can attract aphids. It can also repel cabbage loopers, an insect that can cause problems. Dill is an annual that can quickly spread in your garden.
The presence of dill in the vicinity of asparagus can help to reduce pest infestations. It attracts beneficial insects such ladybugs and lacywings that feed upon aphids. Additionally, dill can be used to repel spider mites. These mites feed on plant sap and tissue. Additionally, the plant provides shade and attracts birds which can help spread seeds or control pests.
Avoid dill disease
Although dill is relatively resistant to disease, it can occasionally suffer from aphids. You can spray the plant with water from your hose to eliminate aphids. Aphids stick to the wet underside of the leaves, and spraying repeatedly will help kill them. In some cases, dill plants can also develop fungal infections. Spraying with sulfur is an effective treatment in this situation.
Downy mildew is another dill disease you should avoid. This fungal disease can lead to yellow spots and fluffy growth on the plant's leaves. Planting dill in an area where there is adequate air circulation will help to avoid this problem. Rotating crops will also help to prevent dill-weed disease.
It is also important to clip dill plants regularly for their health. When the leaves become large enough for you to use, it is important that you trim your dill plants frequently. This will encourage the plant produce more leaves. If you fail to cut dill enough, your plants will become sparse.
After being planted, dill plants must be watered often and kept moist. Plants can self-seed if the soil isn't too dry. The winter is when you need to cut down dill so that it is at the ground. The plant will be back in spring.
A good way to avoid dill-related diseases is to ensure that it gets enough sun. Although dill thrives in full sun, it can also be grown in partial shade. Dill needs at least six hours of direct sun each day.
Harvest dill leaves
You need to know when to pick dill leaves if you grow dill. The ideal time to harvest the leaves is just before the plant begins to flower. Because the flower buds are still tiny, this is the best time to harvest the leaves. After harvesting the leaves, dry them and then freeze them. You can also give some plants the option to grow from seed, if you don’t want to wait to see the flower.
Dill plants are characterized by four to five branches. When the leaves reach six to eight inches tall and the leaves turn yellow, harvest them. When the temperature is high and the leaves are still damp, it is best to harvest the leaves early in the morning. This will enable the plant to grow more leaves and recover faster after trimming.
Harvesting dill leaves is easier than you might think. This herb can be grown to multiple large plants. It is important to harvest leaves without damaging the plants. You can also gather dill seed, which are a yellowish color. These seeds can be used immediately or stored for later.
Dill is tolerant of poor soil conditions so long as it has lots of drainage and sun. It grows best in well-drained, loamy soil that's slightly acidic. Dill can also be grown in a pot. Keep your dill plants hydrated and ensure that they get enough air circulation.
After harvesting dill leaves, you should wash them in cold water. Wrap the leaves with a moist fabric and store them in the refrigerator. The leaves can be kept fresh for up to two weeks. Be sure to reuse the stems.
FAQ
When to plant herbs
Spring should be when the soil temperature reaches 55 degrees F. They should be in full sun to get the best results. For basil indoors, plant seedlings in potting mix-filled pots and let them grow until they produce leaves. When the plants have started to grow, transfer them into bright indirect sunlight. After three weeks, you can transplant them to individual pots and water them every day.
When to plant flowers?
When the weather is milder and the soil has a good moisture content, spring is the best time to plant flowers. If you live in a cold area, plant flowers only after the first frost. The ideal temperature to grow plants indoors is 60 degrees Fahrenheit.
Can I grow vegetables indoors
Yes, it's possible to grow vegetables inside during the winter months. A greenhouse or grow light will be required. You should check the laws in your area before you purchase a greenhouse.
What is the difference between aquaponic gardening or hydroponic?
Hydroponic gardening makes use of nutrient-rich water rather than soil to grow plants. Aquaponics is a system that combines fish tanks and plants to create an ecosystem that is self-sufficient. Aquaponics is like having your own farm in your home.
Are pots possible to grow fruit trees?
Yes! If space is limited, you can grow fruit trees in pots. Make sure your pot is drained to prevent the tree from getting rotted by excess moisture. You should also ensure that the pot is deep sufficient to support the root ball. This will help prevent stress on the tree.
What amount of sunlight does a plant require?
It all depends on what kind of plant you have. Some plants need 12 hours direct sunlight each day. Some plants prefer 8 hours of direct sunlight. Most vegetables need 10 hours of direct sunlight per 24-hour period.
How can I tell what kind of soil is mine?
The dirt's color can tell you what it is. More organic matter is found in darker soils than in lighter soils. Another option is to test the soil. These tests determine the amount of nutrients in the soil.
Statistics
- Today, 80 percent of all corn grown in North America is from GMO seed that is planted and sprayed with Roundup. - parkseed.com
- 80% of residents spent a lifetime as large-scale farmers (or working on farms) using many chemicals believed to be cancerous today. (acountrygirlslife.com)
- According to a survey from the National Gardening Association, upward of 18 million novice gardeners have picked up a shovel since 2020. (wsj.com)
- According to the National Gardening Association, the average family with a garden spends $70 on their crops—but they grow an estimated $600 worth of veggies! - blog.nationwide.com
External Links
How To
How To Start A Garden
It is much easier than most people believe to start a garden. There are many ways to start a garden.
Another option is to buy seeds from your local nursery. This is probably the best way to start a backyard garden.
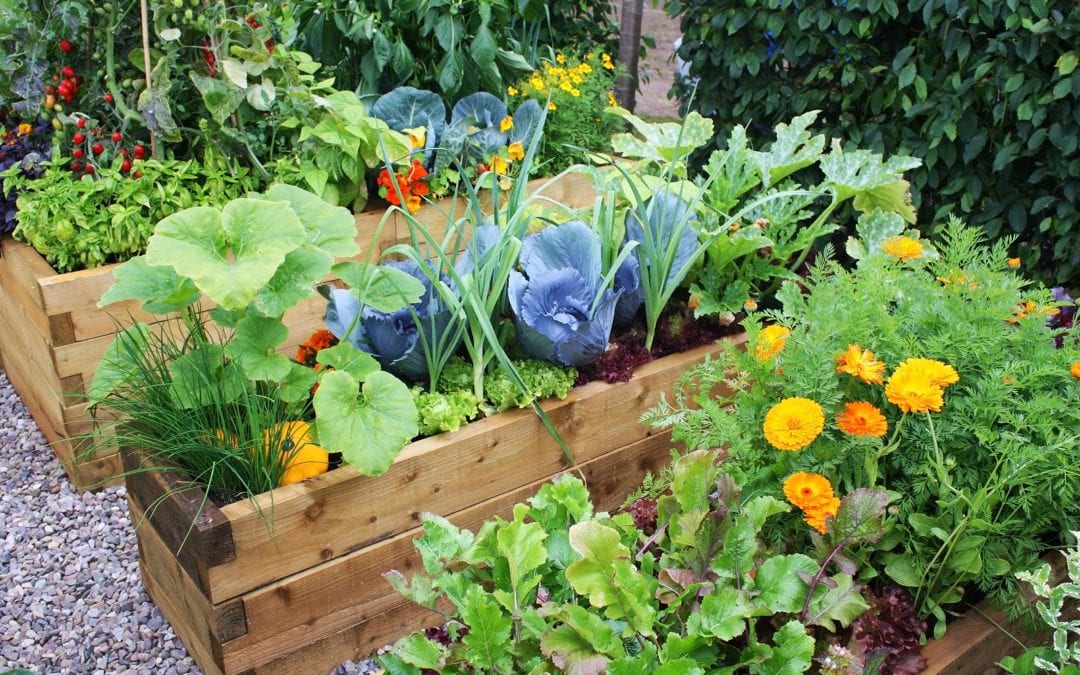
Another option is to purchase a plot of land for a community-based garden. Community gardens are usually located near schools, parks, and other public areas. Many of these plots include raised beds for vegetables.
Container gardening is an easy way to plant a garden. Container gardening involves purchasing a small pot or planter and filling it with dirt. You can then plant your seedlings.
You could also purchase a kit that is already assembled. Kits include everything needed to get started. Some kits come with tools and other supplies.
The best thing about starting a garden is that there are no rules. You can do what suits you best. It is important to remember these basics.
Decide what type of garden you want. Are you looking for a large garden? Or would you rather just have a few herbs in pots?
Next, decide where you'll plant your garden. Is it going to be in a container? Or will you plant in the ground?
Once you know which type of garden you want to build, you can begin shopping for materials.
Consider how much space is available. It is possible that you don't have the space to grow a garden in your apartment.
Finally, once you have determined where you will be building your garden, you can get started. First, prepare the area.
This means that you need to remove any weeds or debris. Next, make a hole in the ground for each plant. Be sure to dig the holes deep enough so that the roots don’t reach the sides as they grow.
Add topsoil and compost to fill in the gaps. Add organic matter to help retain moisture.
After the site has been prepared, you can add the plants. Make sure they are not overcrowded. They require space to grow.
As the plants grow, keep adding organic matter. This helps prevent disease, and keeps the soil nourished.
Fertilize the plants when you notice new growth. Fertilizer encourages strong root systems. It promotes faster, healthier growth.
Continue watering the plants until they reach maturity. Once this is achieved, harvest the fruit and enjoy!